SECTION 501-03: Body Closures
2014 Flex Workshop Manual
REMOVAL AND INSTALLATION
Procedure revision date: 05/02/2013

Liftgate


Material
Item Specification
Threadlock 262
TA-26
WSK-M2G351-A6


Item Part Number Description
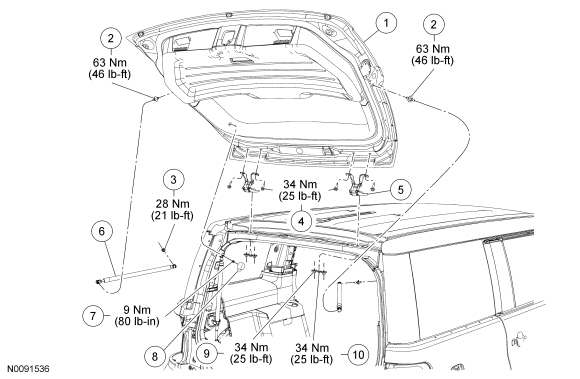
1 7440010 Liftgate assembly
2 W713408 Liftgate strut-to-liftgate studs (2 required)
3 W713408 Liftgate strut-to-body stud (2 required)
4 N806738 Liftgate hinge-to-liftgate bolts (4 required)
5 7442900 Liftgate hinge (2 required)
6 74406A10 LH/ 74406A11 RH Liftgate strut (2 required)
7 W520201 Power liftgate rod-to-liftgate nut
8 7821978 Power liftgate rod-to-liftgate nut cover
9 W711324 Liftgate hinge-to-body nut (4 required)
10 W713162 Liftgate hinge-to-body bolt (2 required)

Removal and Installation

All vehicles

  1. Remove the D-pillar trim panels. For additional information, refer to Section 501-05 .
  1. Remove the C-pillar trim panels. For additional information, refer to Section 501-05 .

Vehicles equipped with glass roof

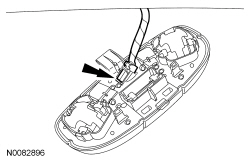
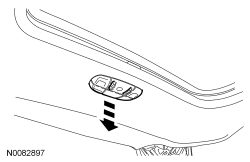
  1. Remove the rear dome lamp.
  1. Disconnect the dome lamp electrical connector.
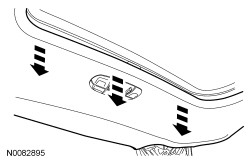
  1. Pull downward on the sunshade frame at the rear of the back window opening panel to release the sunshade frame pin-type retainers.

All vehicles

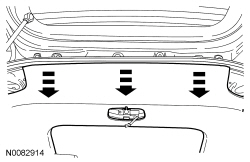
  1. Release the rear headliner pin-type retainers.
  1. Lower the rear of the headliner to gain access to the electrical connectors.
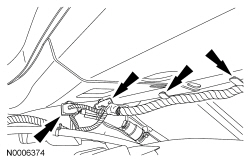
  1. Disconnect the electrical connectors and the routing clips.
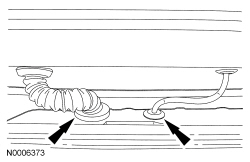
  1. Disconnect the rear washer hose routing.
  1. Disconnect the grommets from the vehicle body.

Vehicles with power liftgate

  1. Remove the power liftgate rod-to-liftgate nut cover and nut.
  1. Remove the power liftgate rod from the liftgate.

All vehicles

  1. Support the liftgate in the open position.
  1. Remove the liftgate struts.
  1. With help from an assistant, remove the liftgate hinge-to-liftgate bolts.
  1. With help from an assistant, remove the liftgate.
  1. To install, reverse the removal procedure.