SECTION 501-10: Seating
| 2014 Flex Workshop Manual
|
REMOVAL AND INSTALLATION
| Procedure revision date: 05/02/2013
|
Removal and Installation
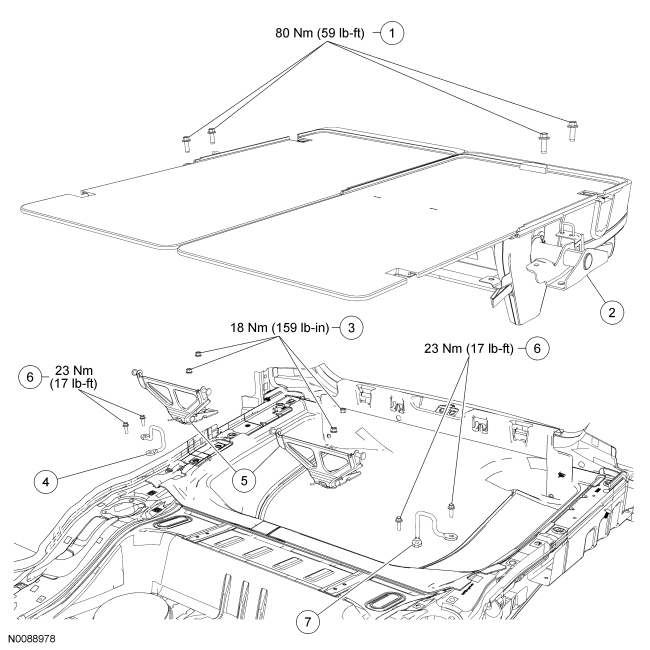
| Item | Part Number | Description |
|---|---|---|
| 1 | W505285 | Seat mounting bracket-to-floor bolts (4 required) |
| 2 | — | Seat assembly |
| 3 | N804796 | Load floor support-to-floor pan nuts |
| 4 | 62440 | RH cushion floor striker |
| 5 | 60592 | Load floor supports |
| 6 | W505264 | Cushion floor striker-to-floor pan bolts |
| 7 | 62441 | LH cushion floor striker |
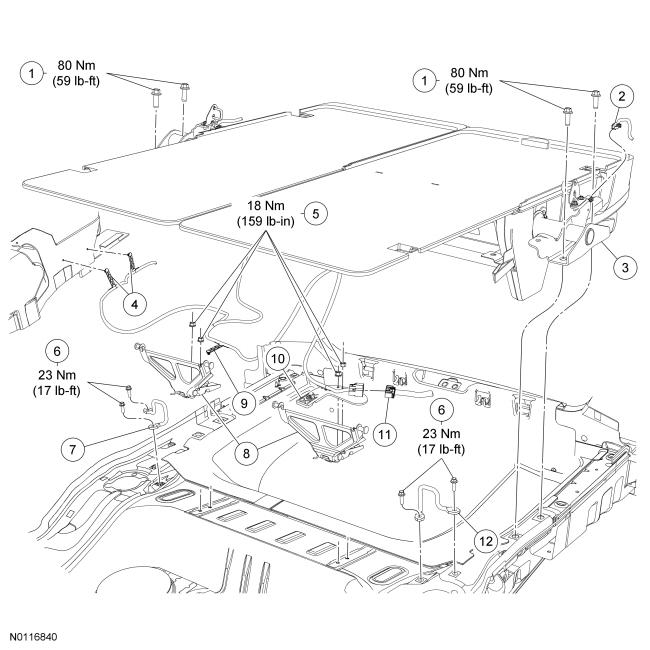
| Item | Part Number | Description |
|---|---|---|
| 1 | W505285 | Seat mounting bracket-to-floor bolts (4 required) |
| 2 | — | LH stow motor electrical connector (part of 14A005) |
| 3 | — | Seat assembly |
| 4 | — | Wire harness retainers (part of 14B719) |
| 5 | N804796 | Load floor support-to-floor pan nuts |
| 6 | W505264 | Cushion floor striker-to-floor pan bolts |
| 7 | 62440 | RH cushion floor striker |
| 8 | 60592 | Load floor supports |
| 9 | — | Wire harness retainer (part of 14B719) |
| 10 | — | Wire harness retainer (part of 14B719) |
| 11 | — | Seat main feed electrical connector (part of 14A005) |
| 12 | 62441 | LH cushion floor striker |
All seats

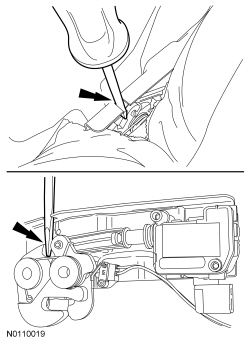
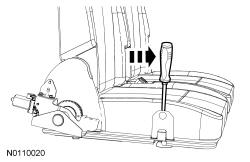
Power seat with inoperable seat latch
NOTE: RH seat shown, LH similar.
Push the cushion cover and foam pad back and locate the power seat latch by-pass cut-out in the bracket.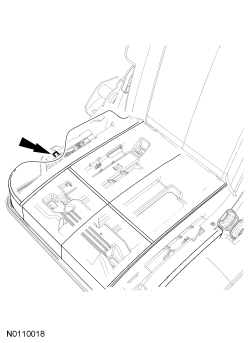
Power seat with inoperable stow motor
NOTE: LH shown, RH similar.
Pry to release the clips and remove the backrest latch outer cover.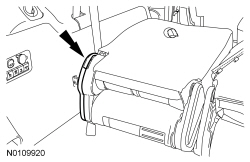
NOTICE: Make sure the wire harness is not damaged while positioning the release lever or the power-fold seat will not operate correctly.
NOTE: LH seat shown, RH similar.
Position the pivot release lever down and pivot the seat away from the floor striker.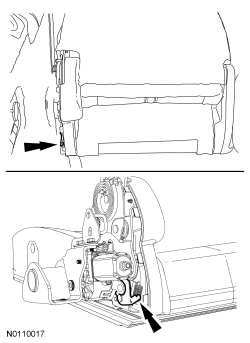
All seats
NOTICE: If equipped with a power seat, do not lift the load floor flapper panels too far or damage to the wire harness retainers will occur.
Separate the 2 load floor supports (1 shown).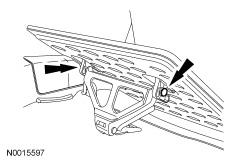
Power seat
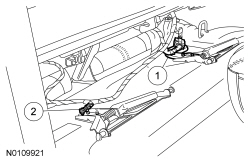
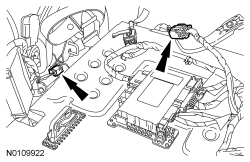
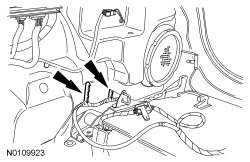
All seats