SECTION 501-14A: Handles, Locks, Latches and Entry Systems — Without Intelligent Access (IA)
2014 Flex Workshop Manual
REMOVAL AND INSTALLATION
Procedure revision date: 05/02/2013

Front Door Latch

Removal and Installation

NOTE: The door glass must be completely raised.

  1. Remove the front door trim panel. For additional information, refer to Section 501-05 .
  1. For the driver door, remove the door lock cylinder. For additional information, refer to Door Lock Cylinder in this section.
  1. For the passenger door, remove the exterior door handle. For additional information, refer to Exterior Door Handle in this section.
  1. Position the water shield aside.
  1. Disconnect the front door latch actuator electrical connector.
  1. Remove the door lock rod extension from the door lock rod.
  1. Push the door lock rod and grommet through the door panel.
  1. Push the interior door handle cable and grommet through the door panel, and pull them back out through the door panel access hole.
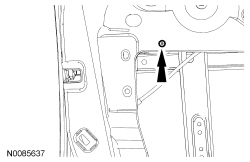
  1. Remove the door latch carrier screw.
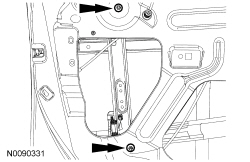
  1. Remove the 2 window glass rear track nuts.
  1. NOTICE: To prevent the front door glass from breaking, do not use excessive force when pushing on the window glass track.

    Push the lower window glass track stud through the door panel towards the front of the vehicle.
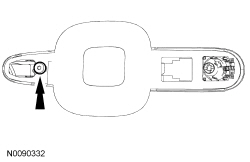
  1. Loosen the exterior door handle reinforcement bolt.
  1. Slide the exterior front door handle reinforcement to the front of the vehicle and push it inside the door.
  1. Disconnect the keyless entry keypad (if equipped) electrical connector and unclip the harness from the door.
  1. Remove the 3 front door latch bolts.
  1. Remove the complete latch, carrier, and handle reinforcement assembly from the door.
  1. Detach the lock cylinder rod from the lock cylinder lever (if equipped).
  1. Open the clip and disconnect the exterior front door handle actuating rod.
  1. Unclip and remove the front door latch from the carrier.
  1. To install, reverse the removal procedure.