
205-153 (T80T-4000-W)

303-1247/2

303-1247/1
SECTION 303-01B: Engine — 3.5L GTDI
| 2014 Flex Workshop Manual
|
IN-VEHICLE REPAIR
| Procedure revision date: 05/02/2013
|
 | Handle
205-153 (T80T-4000-W) |
 | Installer, VCT Spark Plug Tube Seal
303-1247/2 |
 | Remover, VCT Spark Plug Tube Seal
303-1247/1 |
| Item | Specification |
|---|---|
| Motorcraft® High Performance Engine RTV Silicone
TA-357 | WSE-M4G323-A6 |
| Motorcraft® Metal Surface Prep
ZC-31-A | — |
| Motorcraft® SAE 5W-30 Premium Synthetic Blend Motor Oil (US); Motorcraft® SAE 5W-30 Super Premium Motor Oil (Canada)
XO-5W30-QSP (US); CXO-5W30-LSP12 (Canada) | WSS-M2C946-A |
| Motorcraft® Silicone Gasket Remover
ZC-30 | — |
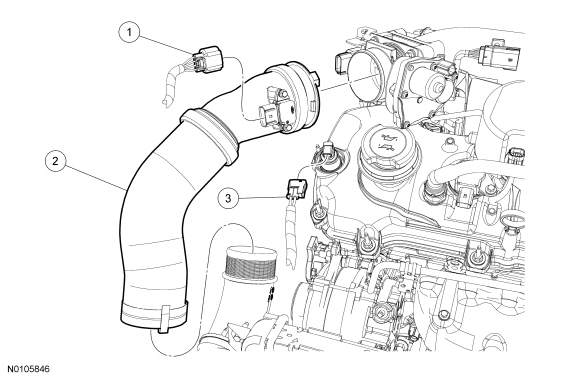
| Item | Part Number | Description |
|---|---|---|
| 1 | 14A464 | Turbocharger Boost Pressure (TCBP)/Charge Air Cooler Temperature (CACT) Sensor electrical connector (part of 12C508) |
| 2 | 6F073 | Charge Air Cooler (CAC) outlet pipe |
| 3 | 14A464 | LH Variable Camshaft Timing (VCT) solenoid electrical connector (part of 12C508) |
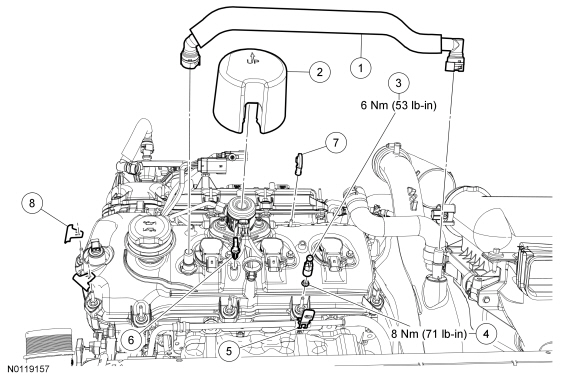
| Item | Part Number | Description |
|---|---|---|
| 1 | 6758 | Crankcase vent tube |
| 2 | 6N041 | Fuel injection pump noise insulator shield |
| 3 | 6N958 | Engine cover mounting stud |
| 4 | W520100 | Oil supply tube bracket nut |
| 5 | 6N660 | Oil supply tube bracket |
| 6 | 14197 | Wiring harness retainer (part of 12C508) |
| 7 | W700497 | Wiring harness retainer (part of 12C508) |
| 8 | 13A506 | Wiring harness retainer (part of 12C508) (2 required) |
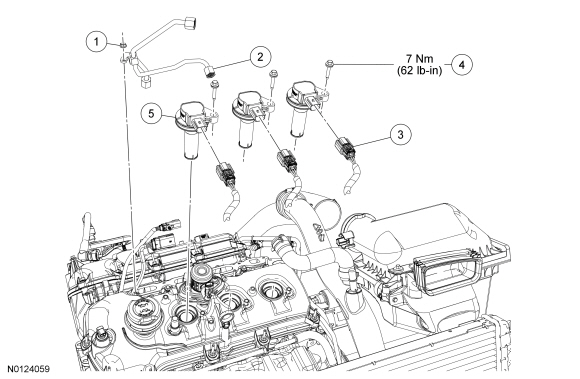
| Item | Part Number | Description |
|---|---|---|
| 1 | W520100 | Fuel injection pump tube nut |
| 2 | 9J323 | High-pressure fuel tube flare nut (3 required) |
| 3 | 14A464 | Ignition coil-on-plug electrical connector (part of 12C508) (3 required) |
| 4 | W708833 | Ignition coil-on-plug bolt (3 required) |
| 5 | 12A375 | Ignition coil-on-plug (3 required) |
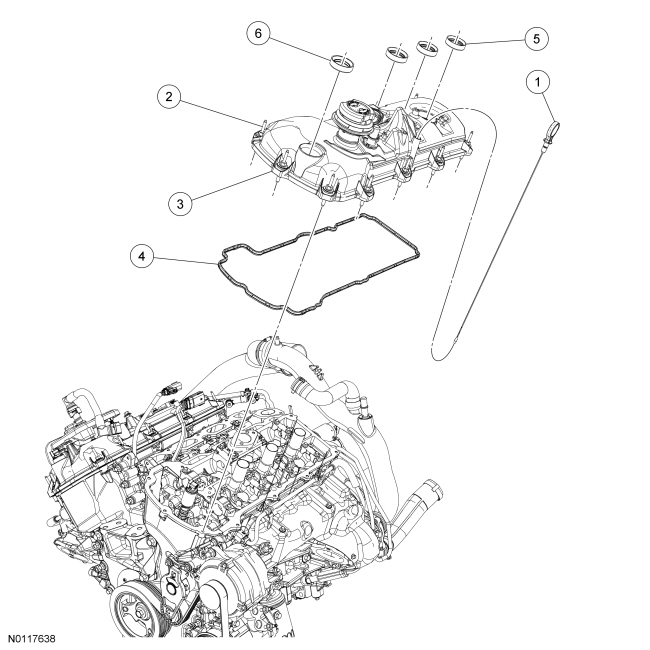
| Item | Part Number | Description |
|---|---|---|
| 1 | 6750 | Oil level indicator |
| 2 | — | Valve cover stud bolt (part of 6A513) (10 required) |
| 3 | 6A505 | Valve cover |
| 4 | 6A559 | Valve cover gasket |
| 5 | 6P251 | Spark plug tube seal (3 required) |
| 6 | 6C535 | Variable Camshaft Timing (VCT) solenoid seal |
Removal
NOTICE: During engine repair procedures, cleanliness is extremely important. Any foreign material, including any material created while cleaning gasket surfaces that enters the oil passages, coolant passages or the oil pan, may cause engine failure.
NOTICE: Whenever turbocharger air intake system components are removed, always cover open ports to protect from debris. It is important that no foreign material enter the system. The turbocharger compressor vanes are susceptible to damage from even small particles. All components should be inspected and cleaned, if necessary, prior to installation or reassembly.
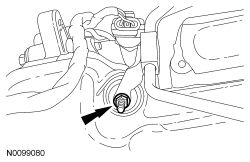
NOTE: To release the fuel pressure in the high-pressure fuel tubes, wrap the flare nut with a shop towel to absorb any residual fuel pressure during the loosening of the flare nuts.
Remove the high-pressure fuel tube flare nut from the fuel injection pump. Remove the 2 high-pressure fuel tube flare nuts from the fuel rails and remove the high-pressure fuel tube assembly.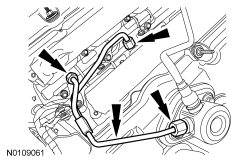
NOTE: When removing the ignition coil-on-plugs, a slight twisting motion will break the seal and ease removal.
Remove the 3 bolts and the 3 LH ignition coil-on-plugs.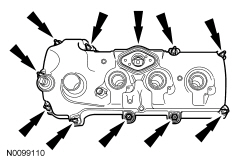
NOTE: VCT solenoid seal removal shown, spark plug tube seal removal similar.
Inspect the VCT solenoid seals and the spark plug tube seals. Remove any damaged seals.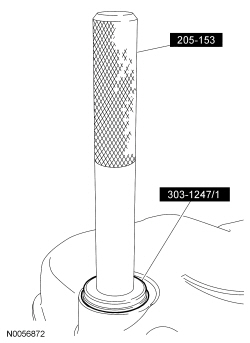
Installation
NOTE: Installation of new seals is only required if damaged seals were removed during disassembly of the engine.
NOTE: Spark plug tube seal installation shown, VCT solenoid seal installation similar.
Using the VCT Spark Plug Tube Seal Installer and Handle, install new VCT solenoid and/or spark plug tube seals.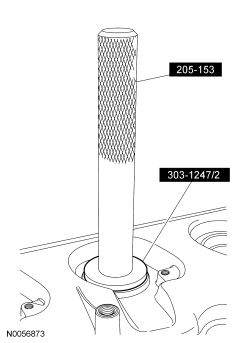
NOTICE: Failure to use the correct Motorcraft® High Performance Engine RTV Silicone may cause the engine oil to foam excessively and result in serious engine damage.
NOTE: If the valve cover is not installed and the fasteners tightened within 4 minutes, the sealant must be removed and the sealing area cleaned. To clean the sealing area, use silicone gasket remover and metal surface prep. Failure to follow these instructions can cause future oil leakage.
Apply an 8 mm (0.31 in) bead of Motorcraft® High Performance Engine RTV Silicone to the engine front cover-to-LH cylinder head joints.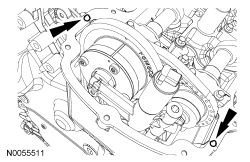
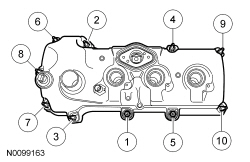
NOTE: To install, apply clean engine oil to the threads of the 3 high-pressure fuel tube flare nuts.
Install the high-pressure fuel tube and tighten the 3 flare nuts in the following 3 stages.

NOTE: Align the index marks for the CAC outlet pipe.
Install the CAC outlet pipe and tighten the 2 clamps.