SECTION 204-01: Front Suspension
| 2014 Flex Workshop Manual
|
REMOVAL AND INSTALLATION
| Procedure revision date: 05/02/2013
|
Stabilizer Bar
Removal and Installation
NOTICE:
Suspension fasteners are critical parts because they affect performance of vital components and systems and their failure may result in major service expense. New parts must be installed with the same part numbers or equivalent part, if replacement is necessary. Do not use a replacement part of lesser quality or substitute design. Torque values must be used as specified during reassembly to make sure of correct retention of these parts.
NOTE:
Make sure the steering wheel is in the unlocked position.
NOTE:
The stabilizer bushing and bracket are part of the stabilizer bar assembly. The stabilizer bar will not turn easily in the bushing.
All vehicles
- With the vehicle in NEUTRAL, position it on a hoist. For additional information, refer to
Section 100-02
.
- Remove the wheel and tire. For additional information, refer to
Section 204-04
.
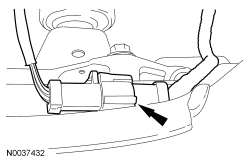
- Disconnect the Heated Oxygen Sensor (HO2S) electrical connector and unclip the connector from the subframe.
All-Wheel Drive (AWD) vehicles
- Remove the exhaust Y-pipe. For additional information, refer to
Section 309-00
.
All vehicles
NOTICE:
Do not use power tools to remove the stabilizer bar link nut. Damage to the stabilizer link ball joint or boot may occur.
NOTE:
To remove the stabilizer bar link nut, first loosen the nut, then use the hex-holding feature to prevent the ball joint from turning while removing the stabilizer bar link nut.
Remove and discard the stabilizer bar link lower nuts.
- To install, tighten the new nuts to 150 Nm (111 lb-ft).
NOTE:
No special tools are necessary to separate the tie rod from the front knuckle; use a mallet to loosen the joint.
Remove and discard both tie-rod end nuts and separate the tie-rod ends from the knuckles.
- To install, tighten the new nuts to 150 Nm (111 lb-ft).
NOTE:
Install the new lower arm rearward bolts from the bottom of the lower arm bushing with the nuts on top.
Remove and discard the 4 lower arm rearward nuts and bolts.
- To install, tighten the new bolts to 99 Nm (73 lb-ft).
- Remove and discard the 2 lower arm forward bolts.
Position both lower arms aside.
- To install, tighten the new bolts to 185 Nm (136 lb-ft).
- Using a suitable screw-type jackstand, support the rear of the subframe.
- Remove the 2 steering gear nuts and bolts.
- Vehicles with Electronic Power Assist Steering (EPAS)
- To install, tighten the nuts to 165 Nm (122 lb-ft).
- Vehicles with Hydraulic Power Assist Steering (HPAS)
- To install, tighten the new nuts to 117 Nm (86 lb-ft).
- Remove and discard the 4 subframe bracket bolts.
- To install, tighten the new bolts to 55 Nm (41 lb-ft).
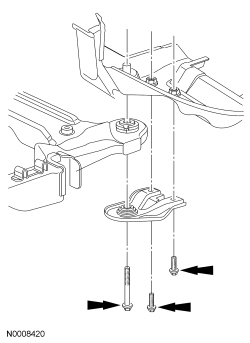
- Remove and discard the subframe forward bolts.
- To install, tighten the new bolts to 200 Nm (148 lb-ft).
- Remove and discard the subframe rearward bolts.
- Vehicles with
- To install, tighten the new bolts to 150 Nm (111 lb-ft).
- Vehicle with
- To install, tighten the new bolts to 175 Nm (130 lb-ft).
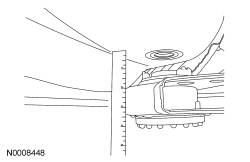
- Lower the rear of the subframe approximately 51 mm (2 in).
- Remove and discard the LH and RH stabilizer bar bracket bolts.
- To install, tighten the new bolts to 55 Nm (41 lb-ft).
- Remove the stabilizer bar by guiding it between the subframe and the steering gear toward the RH side of the vehicle.
- To install, reverse the removal procedure.


