
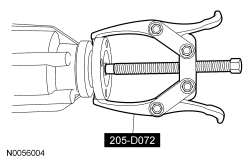
205-D072 (D97L-4221-A) or equivalent

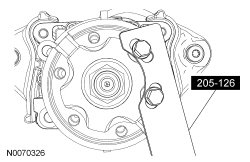
205-126 (T78P-4851-A)

205-133 (T79P-4676-A)

307-309 (T94P-77001-BH)

100-001 (T50T-100-A)
SECTION 205-02: Rear Drive Axle/Differential
| 2014 Flex Workshop Manual
|
IN-VEHICLE REPAIR
| Procedure revision date: 05/02/2013
|
 | 2 Jaw Puller
205-D072 (D97L-4221-A) or equivalent |
 | Holding Fixture, Drive Pinion Flange
205-126 (T78P-4851-A) |
 | Pinion Seal Replacer
205-133 (T79P-4676-A) |
 | Remover, Torque Converter Fluid Seal
307-309 (T94P-77001-BH) |
 | Slide Hammer
100-001 (T50T-100-A) |
| Item | Specification |
|---|---|
| Premium Long-Life Grease
XG-1-C or XG-1-K (US); CXG-1-C (Canada) | ESA-M1C75-B |
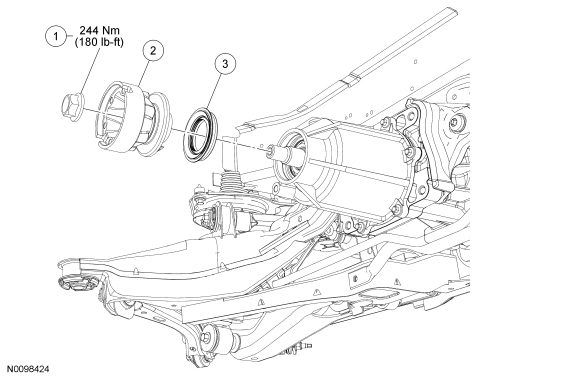
| Item | Part Number | Description |
|---|---|---|
| 1 | 4320 | Pinion nut |
| 2 | 4858 | Pinion flange |
| 3 | 4N299 | Pinion seal |
Removal
NOTICE: The drive pinion seal is only serviceable on vehicles equipped with a stamped steel rear differential housing cover. Vehicles equipped with a aluminum rear differential housing cover replace the complete Rear Drive Unit (RDU) assembly.
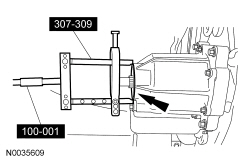
Installation
NOTE: Make sure that the mating surface is clean before installing the new seal.
Using the Pinion Seal Replacer, install the seal.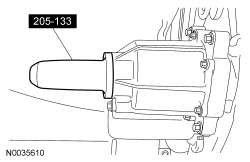
NOTE: Lubricate the pinion flange with grease.
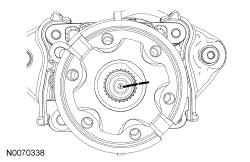
Line up the index marks and position the pinion flange.
