SECTION 308-07B: Transfer Case — Power Transfer Unit (PTU)
| 2014 Flex Workshop Manual
|
REMOVAL AND INSTALLATION
| Procedure revision date: 05/02/2013
|
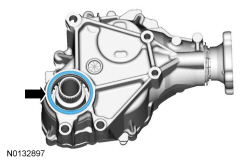
Input Shaft Seal
Special Tool(s)
 | Handle
205-153 (T80T-4000-W)
|
 | Holding Fixture, Transmission
307-003 (T57L-500-B)
|
 | Installer, Parking Brake Bearing
206-040 (T88T-2598-F)
|
 | Remover/Installer, PTU Input Shaft Seal
308-777 (includes 308-777/1, 308-777/2, 308-777/3, 308-777/4 and 308-777/5)
|
Removal
- Remove the
. Refer to
Power Transfer Unit (PTU) — 3.5L
or
Power Transfer Unit (PTU) — 3.5L GTDI
.
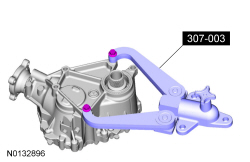
- Special Tool(s): Holding Fixture, Transmission 307-003 (T57L-500-B).
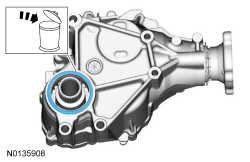
- Discard the specified component. Follow local disposal regulations.
NOTICE:
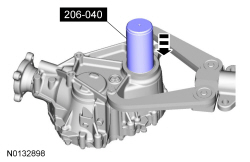
Do not press the seals lower than specified. Excessive force will damage the bearing below the seals.
NOTE:
Both seals will need to be pressed lower into the
input shaft opening to break the seals outer sealant loose from the
.
NOTE:
There is approximately a 5 mm (0.196 in) air gap between both seals and approximately 1 mm (0.039 in) air gap between the inner seal and the bearing race.
- Special Tool(s): Installer, Parking Brake Bearing 206-040 (T88T-2598-F).
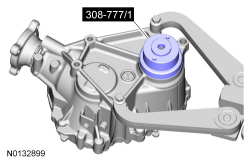
- Special Tool(s): Remover/Installer, PTU Input Shaft Seal 308-777/1.
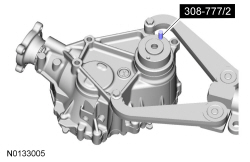
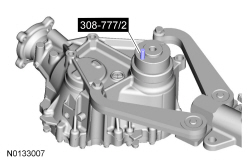
- Special Tool(s): Remover/Installer, PTU Input Shaft Seal 308-777/1, Remover/Installer, PTU Input Shaft Seal 308-777/2.
Press the Remover/Installer, PTU Input Shaft Seal 308-777/2 (punch) downward until the shoulder of the Remover/Installer, PTU Input Shaft Seal 308-777/2 (punch) touches the Remover/Installer, PTU Input Shaft Seal 308-777/1.
NOTE:
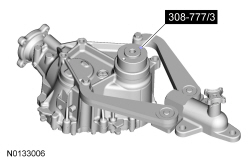
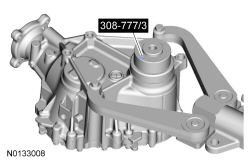
Do not overtighten the Remover/Installer, PTU Input Shaft Seal 308-777/3 (screws). Turn the Remover/Installer, PTU Input Shaft Seal 308-777/3 (screws) until they are seated into the Remover/Installer, PTU Input Shaft Seal 308-777/1 holes.
Special Tool(s): Remover/Installer, PTU Input Shaft Seal 308-777/1, Remover/Installer, PTU Input Shaft Seal 308-777/3 (screws).
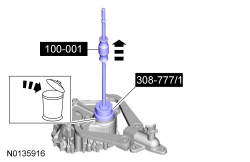
- Special Tool(s): Slide Hammer 100-001 (T50T-100-A), Remover/Installer, PTU Input Shaft Seal 308-777/1.
Discard the specified component. Follow local disposal regulations.
- Drain the
.
- Position the
output flange upward and tilt the
approximately 30 degrees toward the LH seal bore to allow the fluid to drain from the
input shaft opening.
Installation
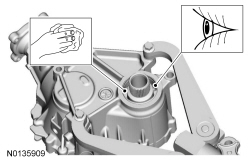
- Clean the specified component with the special material. Visual check.
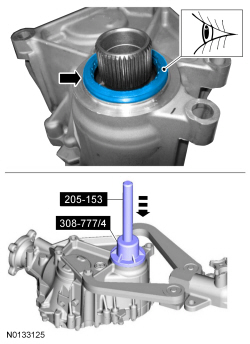
- Visual check.
Special Tool(s): Remover/Installer, PTU Input Shaft Seal 308-777/4, Handle 205-153 (T80T-4000-W).
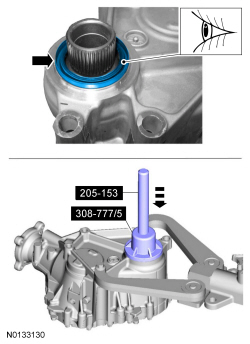
- Visual check.
Special Tool(s): Remover/Installer, PTU Input Shaft Seal 308-777/5, Handle 205-153 (T80T-4000-W).
- New compression seal.
- Install the
. Refer to
Power Transfer Unit (PTU) — 3.5L
or
Power Transfer Unit (PTU) — 3.5L GTDI
.
- Fill the
as necessary. Refer to
Power Transfer Unit (PTU) Draining and Filling
.


