SECTION 211-02: Power Steering
| 2014 Flex Workshop Manual
|
REMOVAL AND INSTALLATION
| Procedure revision date: 05/02/2013
|
Steering Gear
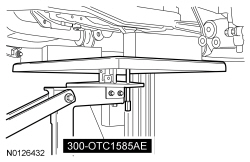
Special Tool(s)
 | Powertrain Lift
300-OTC1585AE or equivalent
|
NOTE:
3.5L
engine shown, 3.7L
similar.
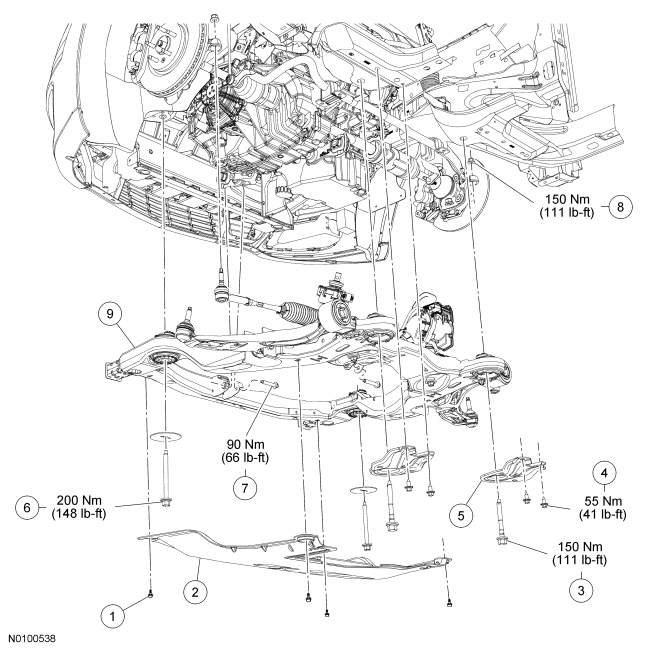
| Item
| Part Number
| Description
| | 1
| —
| Underbody shield retainer (4 required)
|
| 2
| 10494
| Underbody shield
|
| 3
| W714157
| Front subframe rearward bolt (2 required)
|
| 4
| W710999
| Subframe support bracket bolt (4 required)
|
| 5
| 5362
| Subframe support bracket (2 required)
|
| 6
| W710714
| Front subframe forward bolt (2 required)
|
| 7
| W710736
| Roll restrictor-to-subframe bolt (2 required)
|
| 8
| W520215
| Tie-rod end nut (2 required)
|
| 9
| 5N356
| Subframe assembly
|
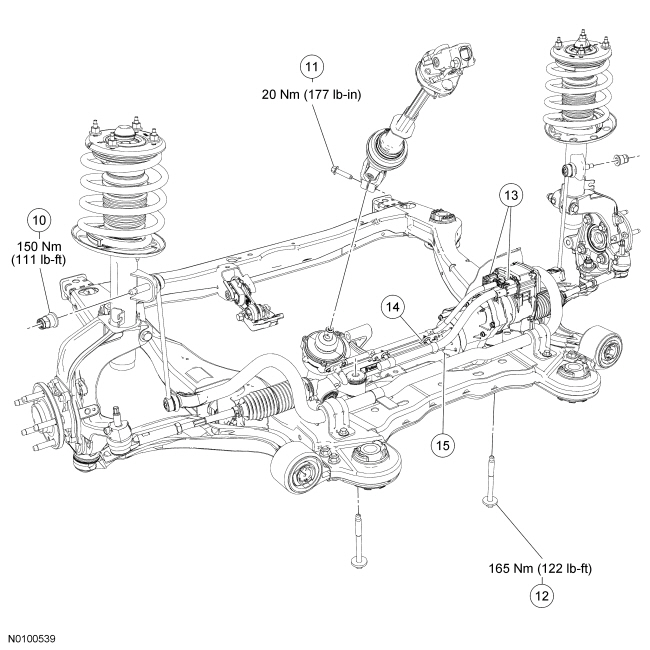
| Item
| Part Number
| Description
| | 10
| W713968
| Stabilizer bar link upper nut (2 required)
|
| 11
| W712961
| Steering column shaft bolt
|
| 12
| W714710
| Steering gear bolt (2 required)
|
| 13
| —
| Electronic Power Assist Steering (EPAS) electrical connectors (part of 3F720) (2 required)
|
| 14
| —
| Wiring harness retainer
|
| 15
| 3200
| Steering gear
|
Removal
All vehicles
- If installing a new steering gear, connect the scan tool and upload the module configuration information from the Power Steering Control Module (PSCM). Refer to
Section 418-01
.
NOTE:
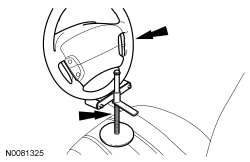
Use a steering wheel holding device (such as Hunter® 28-75-1 or equivalent).
Install a holding device to hold the steering wheel in the straight-ahead position.
- Remove the wheels and tires. Refer to
Section 204-04
.
NOTICE:
Do not allow the steering column shaft to rotate while disconnected from the gear or damage to the clockspring may occur. If there is evidence that the steering column shaft has rotated, remove and recenter the clockspring. Refer to
Section 501-20B
.
Remove the bolt and disconnect the steering column shaft from the steering gear.
- Remove the 2 stabilizer bar link upper nuts.
- Remove the 2 outer tie-rod end nuts and separate the tie-rod ends from the wheel knuckle.
- Remove the 4 retainers and the underbody shield, if equipped.
- Remove the 2 RH engine splash shield-to-subframe pin-type retainers.
Vehicles equipped with a 3.7L
engine
- Remove the Y-pipe. Refer to
Section 309-00
.
- Remove the 2 roll restrictor heat shield nuts and the engine roll restrictor heat shield.
Vehicles equipped with a 3.5L
engine
- Remove the RH and LH exhaust flexible pipes. Refer to
Section 309-00
.
All vehicles
- Remove the 2 front and rear roll restrictor-to-subframe bolts.
- Position the Powertrain Lift under the subframe.
- Remove the 2 front subframe rearward bolts, the 4 support bracket bolts and the 2 subframe support brackets.
- Loosen the 2 front subframe forward bolts.
- Lower the subframe to gain access to the steering gear.
- Remove the flap heat shield bolt an position the flap heat shield to access the
electrical connectors.
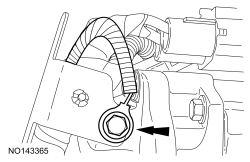
- Remove the wiring harness bracket bolt and position the bracket and ground wire aside.
- Disconnect the 2 Electronic Power Assist Steering (EPAS) electrical connectors and the wiring retainer.
NOTE:
Position the stabilizer bar to the full up position.
Remove the 2 steering gear bolts.
- Remove the steering gear from the RH side of the vehicle.
Installation
All vehicles
- Position the steering gear and install the 2 bolts.
- Tighten to 165 Nm (122 lb-ft).
- Connect the 2
electrical connectors and the wiring retainer.
- Position the wiring harness bracket and ground wire, and install the bolt.
- Tighten to 9 Nm (80 lb-in).
- Position the flap heat shields and install the bolt.
- Tighten to 11 Nm (97 lb-in).
- Raise the subframe.
- Position the 2 subframe support brackets and loosely install the 4 bolts.
- Install the 2 front subframe rearward bolts.
- Tighten the rearward bolts to 150 Nm (111 lb-ft).
- Tighten the forward bolts to 200 Nm (148 lb-ft).
- Tighten the 4 subframe support bracket bolts to 55 Nm (41 lb-ft).
- Install the 2 front and rear roll restrictor-to-subframe bolts.
- Tighten to 103 Nm (76 lb-ft).
Vehicles equipped with a 3.5L
engine
- Install the RH and LH exhaust flexible pipes. Refer to
Section 309-00
.
Vehicles equipped with a 3.7L
engine
- Position the roll restrictor heat shield and install the 2 roll restrictor heat shield heat shield nuts.
- Tighten to 9 Nm (80 lb-in).
- Install the Y-pipe. Refer to
Section 309-00
.
All vehicles
- Install the 2 RH engine splash shield-to-subframe pin-type retainers.
- Position the underbody shield and install the 4 retainers.
- Position the 2 outer tie-rod ends and install the nuts.
- Tighten to 150 Nm (111 lb-ft).
- Connect the stabilizer bar links and install the 2 nuts.
- Tighten the new nuts to 150 Nm (111 lb-ft).
NOTICE:
Do not allow the steering column shaft to rotate while disconnected from the gear or damage to the clockspring may occur. If there is evidence that the steering column shaft has rotated, remove and recenter the clockspring. Refer to
Section 501-20B
.
With the locator on the input shaft correctly aligned, connect the steering column shaft to the steering gear and install the new bolt.
- Tighten to 20 Nm (177 lb-in).
- Install the wheels and tires. Refer to
Section 204-04
.
- When installing a new steering gear, it must be configured (using vehicle as-built data or module configuration information retrieved earlier in this procedure). Refer to Programmable Module Installation (PMI) in
Section 418-01
.
- Check, and if necessary, adjust the front toe. Refer to
Section 204-00
.


