SECTION 412-01: Climate Control
| 2014 Flex Workshop Manual
|
REMOVAL AND INSTALLATION
| Procedure revision date: 05/02/2013
|
| Item | Specification |
|---|---|
| Motorcraft® PAG Refrigerant Compressor Oil
YN-12-D | WSH-M1C231-B |

| Item | Part Number | Description |
|---|---|---|
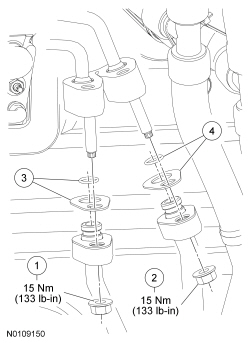
| 1 | W520413 | Auxiliary evaporator inlet line fitting nut |
| 2 | W520413 | Auxiliary evaporator outlet line fitting nut |
| 3 | 19B596 | O-ring seal and gasket seal kit |
| 4 | 19B596 | O-ring seal and gasket seal kit |

| Item | Part Number | Description |
|---|---|---|
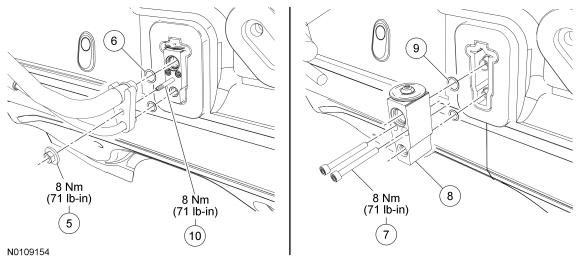
| 5 | W707142 | Thermostatic Expansion Valve (TXV) fitting nut |
| 6 | 19E889 | TXV manifold and tube O-ring seal (2 required) |
| 7 | 7A711 | TXV bolt (2 required) |
| 8 | 19849 | TXV |
| 9 | 19E889 | Evaporator core O-ring seal (2 required) |
| 10 | W714282 | TXV fitting stud |
Removal and Installation
All vehicles

3.5L vehicles
All vehicles