SECTION 501-10: Seating
| 2014 Flex Workshop Manual
|
REMOVAL AND INSTALLATION
| Procedure revision date: 05/02/2013
|
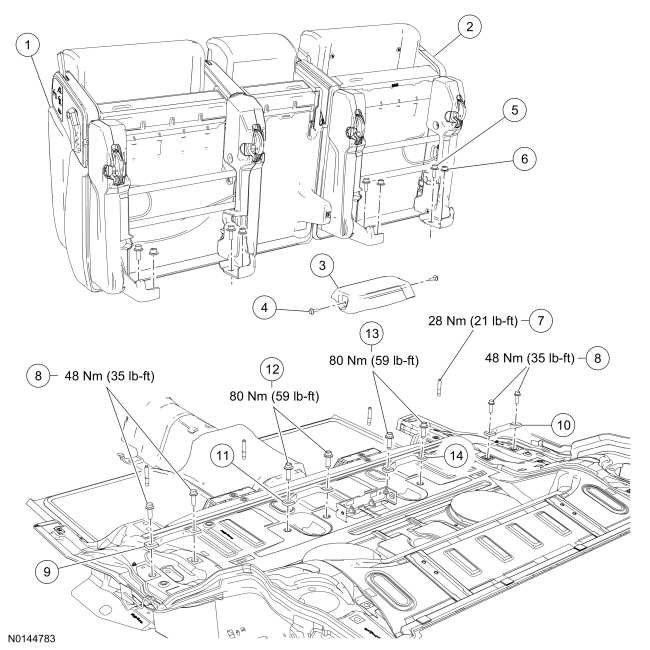
| Item | Part Number | Description |
|---|---|---|
| 1 | — | 60 percent seat assembly |
| 2 | — | 40 percent seat assembly |
| 3 | 04752 | Console bracket cover |
| 4 | W706862 | Screw (2 required) |
| 5 | W708175 | Seat-to-floor bolt (4 required) |
| 6 | N802068 | Seat-to-floor nut (4 required) |
| 7 | W708166 | Floor stud (4 required) |
| 8 | W505275 | Outboard striker-to-floor bolts (4 required) |
| 9 | 78613A64 | LH outboard striker |
| 10 | 74613A64 | RH outboard striker |
| 11 | 74613B96 | LH inboard striker |
| 12 | W714306 | LH inboard striker-to-floor bolts (2 required) |
| 13 | W505285 | RH inboard striker-to-floor bolts (2 required) |
| 14 | 74613B96 | RH inboard striker |
NOTE: LH seat shown, RH similar.
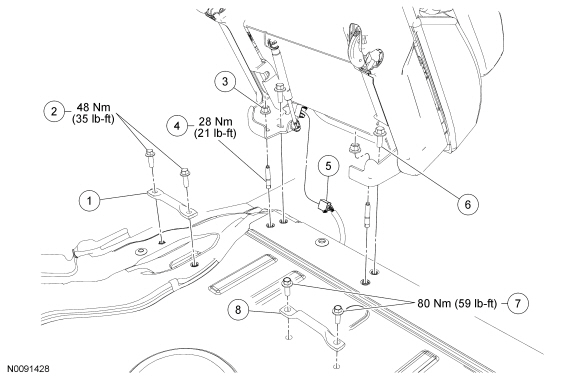
| Item | Part Number | Description |
|---|---|---|
| 1 | 78613A64 | LH outboard striker |
| 2 | W505275 | LH outboard striker-to-floor bolts (2 required) |
| 3 | N802068 | Seat-to-floor nuts (2 required) |
| 4 | W708166 | Floor studs (2 required) |
| 5 | — | Power-fold seat electrical connector |
| 6 | W708175 | Seat-to-floor bolts (4 required) |
| 7 | W714306 | LH inboard striker-to-floor bolts (2 required) |
| 8 | 74613B96 | LH inboard striker |
Removal
All Seats
40 percent and 60 percent seat
NOTE: Returning the seat from the E-Z entry position to the load floor position will latch the inboard latch foot.
The inboard latch foot must latch before the seat backrest will return to the upright position.
Returning the seat backrest to the upright position will latch the outboard latch foot.
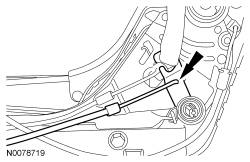
Using the recliner handle, fold the affected 40 percent or 60 percent seat up to the E-Z entry position.60 percent seat with backrest stuck upright

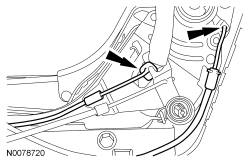
60 percent seat with latch stuck to floor (backrest folds down)

NOTE: Inboard latch shown. Outboard latch similar with latch bolts removed toward LH side of vehicle.
NOTE: A new cover will need to be installed after the seat is removed.
If a latch cannot be released, use a suitable drill or hole saw to open access holes in the affected recliner latch cover and remove the 2 latch bolts.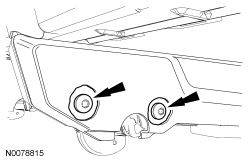
NOTE: Inboard side shown, outboard similar.
Raise the seat and manually release the latch from the striker. After seat removal, repair the seat as needed or refer to Diagnosis and Testing to diagnose the concern.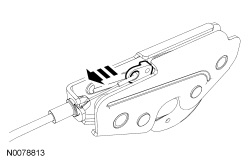
40 percent seat with stuck latch or backrest stuck upright
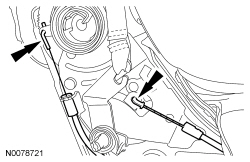
NOTE: Inboard latch shown. Outboard latch similar with latch bolts removed toward RH side of vehicle.
NOTE: A new cover will need to be installed after the seat is removed.
If a latch cannot be released, use a suitable drill or hole saw to open access holes in the affected recliner latch cover and remove the 2 latch bolts.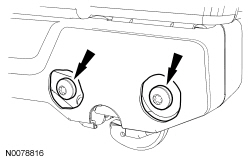
NOTE: Inboard side shown, outboard similar.
Raise the seat and manually release the latch from the striker. After seat removal, repair the seat as needed or refer to Diagnosis and Testing. to diagnose the concern.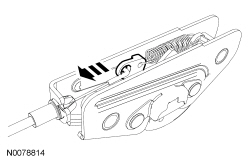
Inboard seat strikers
Outboard seat strikers
Installation
LH inboard striker
NOTE: LH seat inboard striker can be identified with large bolt holes.
Position the LH inboard seat striker to the floor and install the 2 bolts.RH inboard seat striker
Outboard seat strikers
RH 40 percent seat
NOTE: Make sure not to lean or apply any lateral pressure on the seat assembly when tightening the seat track-to-floor fasteners. Doing so may cause a binding condition which may adversely affect the operation of the seat.
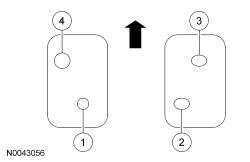
LH 40 percent and 60 percent seats
NOTE: Make sure not to lean or apply any lateral pressure on the seat assembly when tightening the seat track-to-floor fasteners. Doing so may cause a binding condition which may adversely affect the operation of the seat.
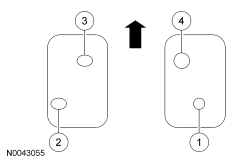
All seats
NOTE: Before installation, make sure the safety belt webbing is not twisted and the safety belts and buckles are accessible to the occupants.
Check the seat for correct operation.